Win11桌面任務(wù)欄怎么設(shè)置|Win11怎樣設(shè)置底部任務(wù)欄
- 2022-01-19 14:02:54 分類:幫助
Win11任務(wù)欄上的有些設(shè)置,是不能通過系統(tǒng)去調(diào)的,需要使用到一些別的方法,這篇文章是本站給大家?guī)淼腤in11桌面任務(wù)欄設(shè)置方法。
Win11任務(wù)欄圖標(biāo)調(diào)大小
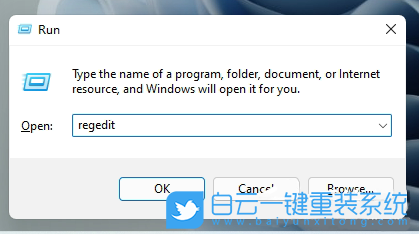
打開運行(Win+R),輸入 regedit 命令,確定或回車,可以打開注冊表編輯器
注冊表編輯器窗口,依次展開到以下路徑:
HKEY_CURRENT_USER\Software\Microsoft\ Windows\CurrentVersion\Explorer\Advanced
然后新建名稱為 TaskbarSi 的DWORD值
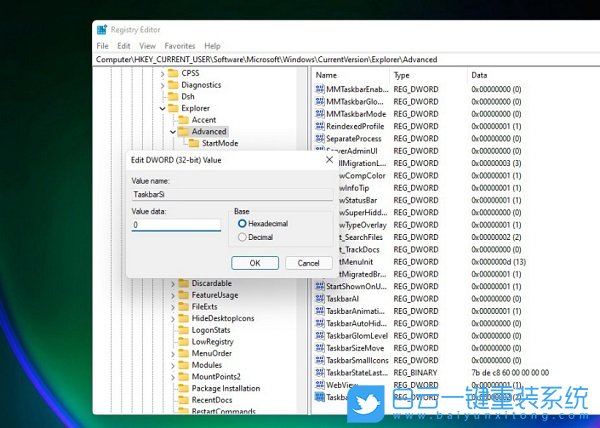
編輯 TaskbarSi 數(shù)值數(shù)據(jù),數(shù)字 0 是小任務(wù)欄,數(shù)字 1 是中任務(wù)欄,數(shù)字 2 是大任務(wù)欄
小任務(wù)欄↓

中任務(wù)欄↓

大任務(wù)欄↓

Win11任務(wù)欄角溢出圖標(biāo)刪除
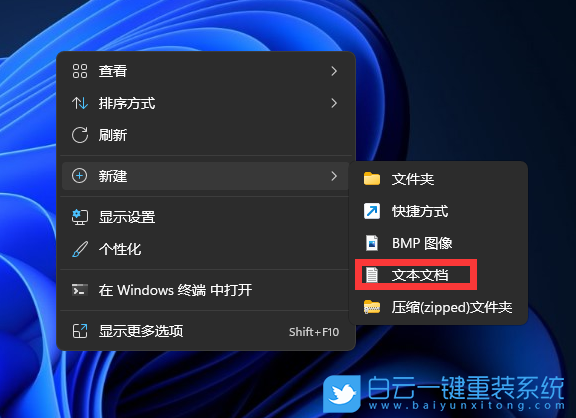
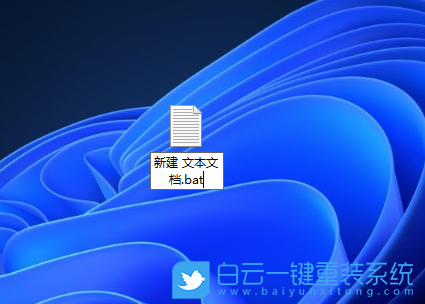
桌面空白處,點擊右鍵,然后選擇新建文本文檔,并且修改文件后綴名為 .bat
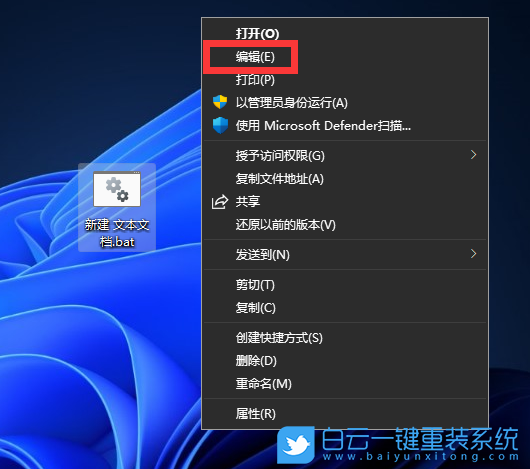
文件名修改之后,選擇并右鍵點擊該文件,在打開的菜單項中,選擇編輯
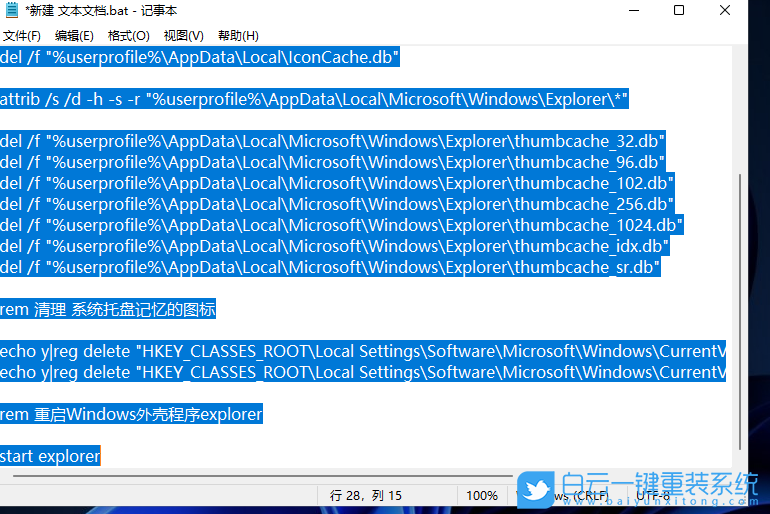
復(fù)制以下代碼,并保存(Ctrl+S)
rem 關(guān)閉Windows外殼程序explorer
taskkill /f /im explorer.exe
rem 清理系統(tǒng)圖標(biāo)緩存數(shù)據(jù)庫
attrib -h -s -r "%userprofile%AppDataLocalIconCache.db"
del /f "%userprofile%AppDataLocalIconCache.db"
attrib /s /d -h -s -r "%userprofile%AppDataLocalMicrosoftWindowsExplorer*"
del /f "%userprofile%AppDataLocalMicrosoftWindowsExplorer humbcache_32.db"
del /f "%userprofile%AppDataLocalMicrosoftWindowsExplorer humbcache_96.db"
del /f "%userprofile%AppDataLocalMicrosoftWindowsExplorer humbcache_102.db"
del /f "%userprofile%AppDataLocalMicrosoftWindowsExplorer humbcache_256.db"
del /f "%userprofile%AppDataLocalMicrosoftWindowsExplorer humbcache_1024.db"
del /f "%userprofile%AppDataLocalMicrosoftWindowsExplorer humbcache_idx.db"
del /f "%userprofile%AppDataLocalMicrosoftWindowsExplorer humbcache_sr.db"
rem 清理 系統(tǒng)托盤記憶的圖標(biāo)
echo y|reg delete "HKEY_CLASSES_ROOTLocal SettingsSoftwareMicrosoftWindowsCurrentVersionTrayNotify" /v IconStreams
echo y|reg delete "HKEY_CLASSES_ROOTLocal SettingsSoftwareMicrosoftWindowsCurrentVersionTrayNotify" /v PastIconsStream
rem 重啟Windows外殼程序explorer
start explorer
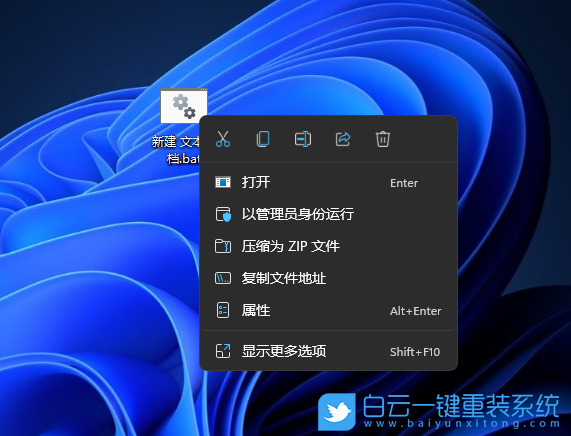
保存好之后,選擇并右鍵點擊該文件,在打開的菜單項中,選擇以管理員身份運行

Win11桌面任務(wù)欄怎么設(shè)置|Win11怎樣設(shè)置底部任務(wù)欄相關(guān)教程
- Windows系統(tǒng)如何設(shè)置主題自動更換|自動更換主題設(shè)
- Win10注冊表如何解決亮度被鎖定|亮度被鎖定的解
- Win7如何取消屏幕鍵盤|關(guān)閉屏幕鍵盤的方法
- Windows如何設(shè)置鍵盤布局|鍵盤布局的設(shè)置方法
- Win7系統(tǒng)WMI服務(wù)如何禁用|WMI服務(wù)的禁用方法
- Win7怎么清理系統(tǒng)日志|清理Win7系統(tǒng)日志的方法
- Win11如何開啟速覽功能|速覽功能的開啟方法
- Win7如何解決屏幕亮度被鎖定|亮度被鎖定的解決方
- Win10怎么設(shè)置壁紙自動更換|設(shè)置自動更換壁紙的

發(fā)布者不受信任怎么辦,如何解決")
Win10系統(tǒng)發(fā)布者不受信任怎么辦,如何解決有用戶反映說,在使用win10系統(tǒng)時,想要打開某些程序,卻提示發(fā)布者并不被信任,提示說為了對計算機進行保護已經(jīng)阻止此

win10系統(tǒng)源文件命令有哪些|Dism命令使用教程")
恢復(fù)win10系統(tǒng)源文件命令有哪些|Dism命令使用教程電腦隨著使用時間的變長,而變得更加容易出現(xiàn)一些問題,比如因為源文件出現(xiàn)變化,就容易導(dǎo)致電腦的資源管理器出現(xiàn)卡頓